How to Locate the Lint Trap on Your Washing Machine
To locate the lint trap on your washing machine, it’s important to understand where lint commonly accumulates. Lint traps are essential for preventing fabric fibers from clogging your machine’s drainage system and maintaining its efficiency.
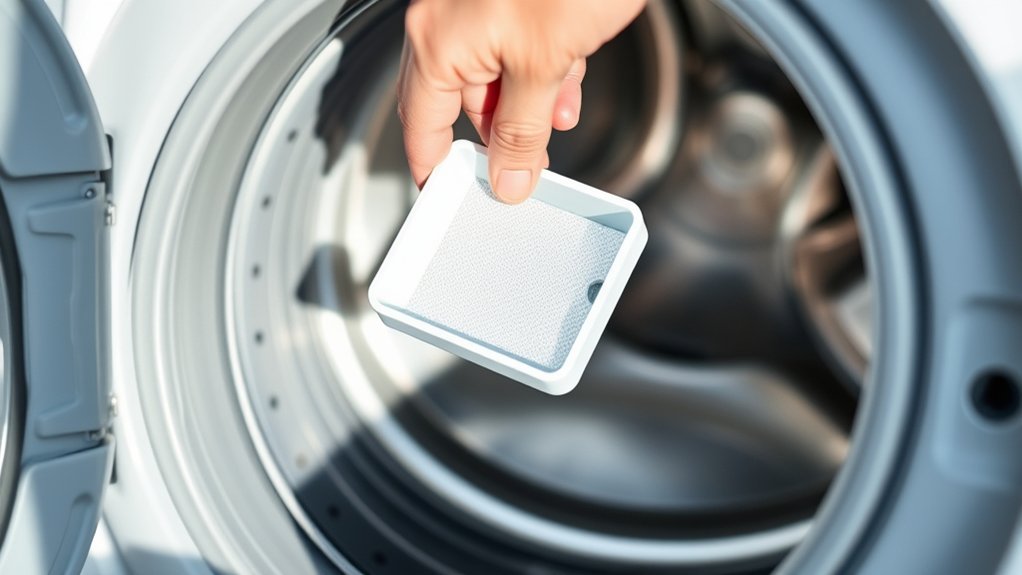
Start by checking common spots like inside the agitator if you have a top loader. For front loaders, inspect behind the lower front panel and inside the door seal. Look for removable mesh filters or small panels near the drum or pump area.
Keep in mind that some washers might not have a traditional lint trap but use other lint-catching systems.
By following these steps, you’ll discover more details about lint trap locations and care tips to keep your washing machine running smoothly.
Key Takeaways
- Check the washer’s manual or manufacturer’s website for specific lint trap details and locations.
- Inspect removable panels near the washer base or front bottom for access to the lint trap.
- Look inside the agitator or under the agitator cap on top-loading washers for the lint trap.
- Examine the door frame, rubber gasket, or drum rim in front-loading washers for hidden mesh filters.
- Identify if the washer uses a drain pump filter or alternative lint management system instead of a traditional lint trap.
Why You Should Care About Your Washer’s Lint Trap

Although you might overlook it, your washer’s lint trap plays an essential role in keeping your machine running smoothly. It catches lint, hair, and fibers that come off your clothes during washing, preventing these particles from clogging your washer’s drainage system. If you ignore this component, lint buildup can cause poor water drainage, unpleasant odors, and even damage to internal parts.
Regularly caring for the lint trap helps maintain your washer’s efficiency and extends its lifespan. Plus, a clean lint trap means cleaner clothes, as trapped lint won’t redeposit onto your laundry. So, paying attention to this small but critical part saves you from costly repairs and improves your washing experience overall.
Taking a moment to maintain the lint trap is a smart move for any washer owner.
How to Tell If Your Washer Has a Lint Trap

Understanding the importance of your washer’s lint trap leads naturally to the next question: how can you tell if your machine actually has one? First, check your washer’s manual or manufacturer’s website. They often specify whether your model includes a lint trap.
If you don’t have the manual, inspect the machine for any removable panels or small mesh filters around the drum or agitator. Some washers, especially newer models, may rely on the drain hose or pump filter to catch lint instead of a traditional lint trap.
You can also run a test wash with a load known to shed lint and see if lint collects in any accessible areas. If you don’t find a lint trap, it’s likely your washer uses an alternative lint-catching method.
Common Lint Trap Locations in Top and Front Loaders
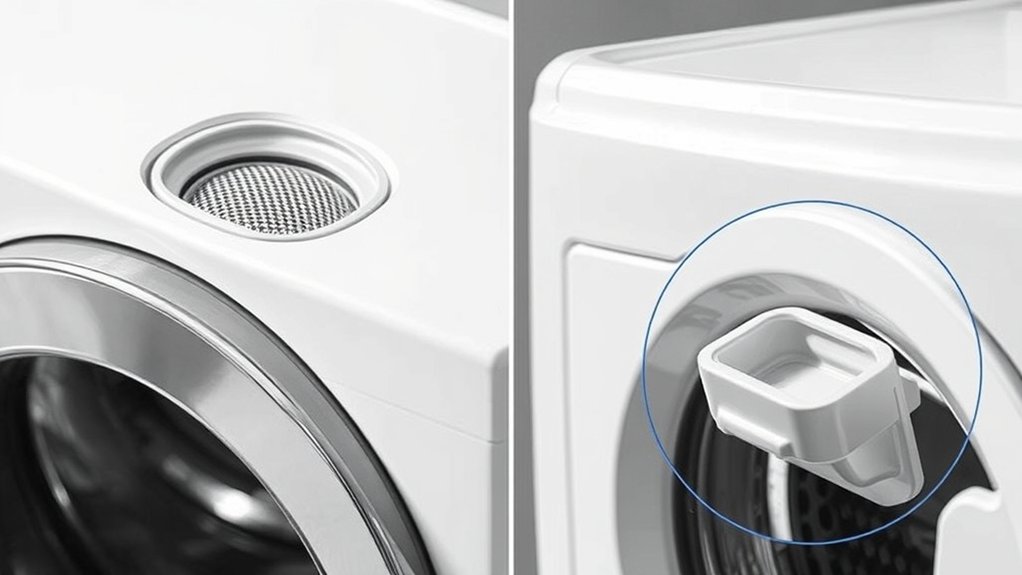
When locating the lint trap on your washing machine, knowing whether you have a top or front loader helps narrow down where to look. Top loaders often have lint traps near the agitator or along the tub rim, while front loaders usually place them behind the lower front panel or inside the door frame.
Checking these spots first can save time.
| Washer Type | Common Lint Trap Location | Notes |
|---|---|---|
| Top Loader | Inside agitator | Remove cap to access |
| Top Loader | Along tub rim | Small mesh screens |
| Front Loader | Lower front panel | Requires panel removal |
| Front Loader | Inside door frame | Usually hidden behind gasket |
| Both | Near water inlet hoses | Less common, but possible |
Find Hidden Lint Traps in the Washer Door Seal
Besides the more obvious lint trap locations like the agitator or front panel, you should also check the washer door seal. Many washers collect lint in the rubber gasket around the door, especially front loaders. To find and clean this hidden lint trap:
- Open the washer door fully to expose the rubber seal.
- Pull back the flexible gasket carefully to inspect inside.
- Look for trapped lint, hair, and debris accumulating in the folds.
- Wipe or vacuum out any lint buildup to prevent clogs and odors.
Regularly checking the door seal helps maintain washer efficiency and keeps your clothes lint-free. Don’t overlook this subtle spot—it’s a common lint trap that’s easy to miss but simple to clean.
Using the Drain Pump Filter as a Lint Trap Alternative
Where can you find an alternative lint trap in your washing machine? Many washers don’t have a traditional lint trap, but you can use the drain pump filter as a lint trap alternative. This filter catches debris, lint, and small objects before water drains out, preventing blockages.
To access it, locate the filter cover—usually at the front bottom of your machine. Opening the cover reveals the drain pump filter, which you can remove and clean regularly. By keeping this filter clear, you guarantee lint doesn’t recirculate or clog your washer’s drainage system.
Using the drain pump filter as a lint trap alternative helps maintain your washer’s efficiency and extends its lifespan without needing a dedicated lint trap.
Tools You Need to Locate and Clean Your Washer’s Lint Trap
To locate and clean your washer’s lint trap, you’ll need a few essential tools like a screwdriver, cleaning brush, and a cloth. Don’t forget to wear gloves to protect your hands from dirt and sharp edges.
Having these items ready will make the process smoother and safer.
Essential Cleaning Tools
Cleaning your washer’s lint trap requires just a few basic tools that you likely already have at home. Having the right tools makes the process quicker and more effective. Here’s what you’ll need:
- Soft Brush – Ideal for gently scrubbing away lint without damaging the trap.
- Vacuum Cleaner with Hose Attachment – Helps suck out stubborn lint and debris from hard-to-reach areas.
- Microfiber Cloth – Perfect for wiping down the lint trap and surrounding surfaces.
- Mild Detergent or Soap – Use this with water to clean any residue or buildup on the trap.
With these tools ready, you’ll easily maintain your lint trap and keep your washing machine running smoothly.
Safety Equipment Needed
Having the right tools for cleaning your washer’s lint trap is important, but don’t overlook the safety equipment that protects you during the process. Start with wearing gloves to protect your hands from sharp edges or grime buildup inside the machine. Safety goggles are a smart choice too, especially if you’re using any cleaning sprays or compressed air to dislodge lint.
You’ll also want to unplug the washing machine before starting to avoid any electrical hazards. If you’re working in a cramped or poorly lit space, a headlamp or portable light can help you see clearly, reducing the risk of accidental injury. Taking these simple precautions guarantees you stay safe while keeping your washer lint-free and running smoothly.
How to Access the Lint Trap on Top-Loading Washers
You’ll usually find the lint trap in top-loading washers near the agitator or along the tub’s rim. To access it, start by unplugging the machine and removing the lid.
Follow these simple steps to carefully take out the lint trap for cleaning.
Common Lint Trap Locations
Although top-loading washers don’t always have a visible lint trap like front-loaders, you can still find and clean the lint filter by checking a few common spots. Knowing where to look saves you time and keeps your washer running smoothly.
Here are four typical locations to check:
- Inside the agitator – Lift the top of the agitator or remove the agitator cap to find a small lint filter.
- Under the top rim – Some models hide the lint trap beneath the washer’s top edge, where water drains.
- Near the pump or motor – Check the back or bottom of the washer for a removable lint screen attached to the pump.
- In the water inlet hoses – Occasionally, lint screens sit within the hoses feeding water into your machine.
Check these spots regularly to keep lint buildup in check.
Step-by-Step Removal Guide
Knowing the common lint trap locations makes it easier to access and clean them on your top-loading washer. Start by unplugging the machine for safety. Open the lid and locate the lint trap, usually on the agitator or near the drum.
Gently pull out the lint trap. If it’s stuck, wiggle it carefully to loosen. Remove any lint buildup by hand or with a soft brush.
Rinse the trap under running water if needed, then dry it before reinserting. Finally, close the lid and plug the machine back in.
| Step | Action |
|---|---|
| 1 | Unplug the washer |
| 2 | Open the lid |
| 3 | Locate and pull out lint trap |
| 4 | Clean and replace the trap |
How to Find the Lint Trap on Front-Loading Washers
Where exactly is the lint trap located on a front-loading washer? Unlike top-loaders, front-loading machines often hide their lint traps in less obvious spots. To find yours, follow these steps:
- Check the door seal: Some lint traps are embedded in the rubber gasket around the door.
- Look inside the drum rim: Inspect the inner edge of the drum for a small mesh filter.
- Examine the bottom front panel: Many models place the lint trap behind a small access door near the machine’s base.
- Consult your user manual: It provides exact lint trap locations specific to your washer model.
Step-by-Step Guide to Removing Your Washer’s Lint Trap Safely
After locating the lint trap on your front-loading washer, the next step is to remove it carefully to maintain your machine’s performance. First, make sure your washer is turned off and unplugged for safety. Open the access panel or door where the lint trap is located.
Gently pull the lint trap out by gripping it firmly but without using excessive force to avoid damage. If it feels stuck, wiggle it slightly to loosen. Place a towel or shallow container underneath to catch any water that might drip out.
Once removed, inspect the trap for any debris or buildup. Avoid using sharp tools that could damage the trap or surrounding components. Always handle the lint trap delicately to ensure it remains intact for reinstallation.
How to Clean the Lint Trap for Better Washer Performance
Since lint buildup can reduce your washer’s efficiency, cleaning the lint trap regularly is essential. Here’s how you can keep it in top shape:
- Remove the lint trap carefully, following your washer’s manual.
- Use a soft brush or cloth to wipe away lint and debris.
- Rinse the trap under warm water to clear any remaining particles.
- Let the trap dry completely before reinstalling it to prevent mold or mildew.
Signs Your Washer’s Lint Trap Is Clogged or Dirty
Regularly cleaning the lint trap helps maintain your washer’s efficiency, but you should also watch for signs that it’s clogged or dirty. If you notice your clothes aren’t coming out as clean or the washer takes longer to complete cycles, your lint trap might be blocked.
You may also see lint buildup inside the drum or around the trap area.
Here’s a quick guide to recognize these signs:
| Sign | What It Means |
|---|---|
| Longer wash cycles | Trap restricts water flow |
| Lint on clothes or drum | Trap isn’t catching debris |
| Unusual washing noises | Motor strain from blockage |
Spotting these early helps you clean or replace the lint trap before bigger issues arise.
Can’t Find Your Washer’s Lint Trap? Here’s What to Do
If you’ve checked the usual spots but still can’t locate your washer’s lint trap, don’t worry—you’re not alone. Some washers have hidden lint traps or use alternative systems to catch lint. Here’s what you can do:
- Consult the owner’s manual: It often details the lint trap’s location or mentions if your model doesn’t have one.
- Check inside the agitator: Many top-load washers have lint traps inside or beneath the agitator.
- Look near the drain pump filter: Front-load washers sometimes collect lint here.
- Search online using your washer’s model number: Forums and manufacturer websites can offer specific guidance.
If you still can’t find a lint trap, your washer might rely on a self-cleaning filter or have a different lint management system altogether.
How Regular Lint Trap Cleaning Extends Your Washer’s Life
Though it’s easy to overlook, cleaning your washer’s lint trap plays a crucial role in keeping your machine running smoothly. When you regularly remove lint buildup, you prevent blockages that can strain your washer’s motor and drainage system. This reduces wear and tear, helping your machine operate efficiently and avoid costly repairs.
Ignoring lint traps can lead to poor water drainage, longer cycle times, and even mold growth inside your washer. By making lint trap cleaning a routine, you maintain ideal performance and extend your washer’s lifespan. Plus, your laundry will come out cleaner without lint residue.
Taking a few minutes to clean the lint trap after every few loads is a simple step that pays off with a longer-lasting, trouble-free washing machine.
Frequently Asked Questions
Can a Clogged Lint Trap Cause Mold in My Washing Machine?
Yes, a clogged lint trap can cause mold in your washing machine because trapped moisture and lint create a perfect environment for mold growth. You should clean it regularly to prevent mold and keep your machine fresh.
How Often Should I Replace My Washer’s Lint Trap?
Just like you’d swap out worn-out sneakers, you should replace your washer’s lint trap every 6–12 months. If you spot tears or persistent clogs despite cleaning, it’s definitely time to get a new one.
Are Lint Traps the Same for All Washing Machine Brands?
No, lint traps aren’t the same for all washing machine brands. You’ll find different designs and locations depending on the model, so you’ll need to check your machine’s manual or manufacturer for the exact type and care instructions.
Can I Use a Lint Trap Cleaner Product Safely?
You can use a lint trap cleaner safely, like a gentle breeze clearing leaves. Just follow the product instructions carefully, avoid harsh chemicals, and test on a small area first to protect your washing machine’s components.
Does a Lint Trap Affect Washing Machine Energy Efficiency?
Yes, a clean lint trap helps your washing machine run more efficiently by preventing blockages and improving water flow.
You’ll use less energy and avoid extra strain on your machine, saving you money and extending its lifespan.
Conclusion
Keeping your washer’s lint trap clean is essential—you might be surprised to know that clogged lint traps can reduce your machine’s efficiency by up to 30%. By regularly checking and cleaning the lint trap, you’ll prevent buildup that causes odors, poor drainage, and even damage.
If you can’t find your lint trap, don’t worry—explore common spots like the door seal or pump filter. A little care goes a long way in extending your washer’s life and performance!
Properly locating and maintaining the lint trap on your washing machine is key to effective cleaning and optimal operation. Regular maintenance ensures your washing machine runs smoothly and lasts longer.